I just love vintage shoe molds! Many of you who follow my blog, know, my great grandfather designed shoes in Italy. When he came to this country with his large family, his wife, 4 girls and 2 boys, he carried many shoe molds to continue his work to support his crew. I am blessed to own several that my grandmother gave to me and I cherish them always for they represent the hard work and care my great grandfather sacrificed to support the ones he loved.
Some of the molds he worked with are displayed in my home in their original form. I love seeing the knicks and dents, scratches and wear from years of use. I would never paint these from great grandpa, but I have painted and designed many. Small molds for Christmas tree ornaments and larger styles for desk accents holding pens and business cards. Even bookends work well with these old treasures.
My Dear friend Ann, from Ann's Finds and I, were talking about the molds while shopping in one of our favorite antique markets, when we saw a "high heel" shoe mold sitting on the checkout desk for customers to use, write with the pen and take a card. They are most unusual and hard to find today, but the one we saw was designed into a desk holder for pen and business cards. Of course we just loved it. I mentioned to Ann how much I would love to find the high heel shoe mold sometime to create something special for a desk accessory.
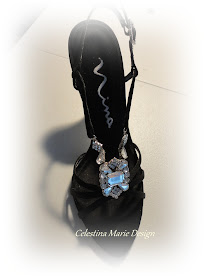
Anyway, long story short, Ann was at an estate sale and found not one, but two molds shaped in the high heel style. She got them both and brought them to me to style. Now the one we saw in the antique market, had a high heel glued on from a vintage high heel. So I began to shop the local thrift stores in search of a skinny high heel pair of shoes to design the two molds Ann found. I did come across a size 7 triple A slinky shoe with lots of bling and straps in black. I checked out the heel and could see this one could be taken apart to use and also I thought the bling from the shoe would be an extra bonus.
Did you notice the shape of the mold? Very rare and hard to find these today. Molds like this can never stand on their own without a heel or pedestal. This pic is the shoe I found. Perfectly chic!!
Now this is the best part. I brought the slinky shoes home and they fit the molds perfectly. I'm not kidding, I couldn't believe it. It was like the molds could have been used to design these shoes.So I did not have to remove the heel, but could use the whole shoe as is and embellish it for the desk accessory we both wanted.
This first one, I created for my desk using some extra gemstones, feathers and added my pen and business cards.
The next pictures are the mold for Ann with more bling, black feathers, leopard print ribbon, gemstone pen and blingy buttons.
This was so much fun and really looks great on the desk. My great grandpa would love it. I think, he may be the reason I love shoes so much. It's in the genes. LOL~~~
The following pics are a few more I've created and sold in my shoppe.
Thank you for stopping by to visit this past post as I join "Show and Tell" this week with Etsy Cottage Style.
Have a special summer day!
Celestina Marie
Tuesday, July 31, 2012
Friday, July 27, 2012
Return Visit to Painting Plastics!!
Greetings Blog Friends,
Recently I had some questions asking about painting on plastic and other surfaces, so I am revisiting a previous post about that type of creating.
I want to add that the Glass and Tile Medium used here from FolkArt/Plaid also works great on glass and metal too and of course on the glass for what it was designed to do. However actually I discovered this for metal when the company discontinued their metal primer. So I tried the G&T on the metal too and it works perfectly to ready your metals for painting, like vintage silverplate trays and other objects. Just remember to let dry completely and best to dry overnight before painting a background or decoration. Have Fun!!
Can it be? Oh yes! Once again Glass and Tile Medium can have you decorating with paint on plastic. See how this plain, but pretty plastic white clock gets transformed into a pretty accessory.I gave the entire surface a coat of the medium, let dry overnight, then painted the roses and finished with a final coat of satin waterbased varnish to protect the surface from scratches. And, you don't have to paint roses to decorate something like this either. Perhaps fun dots, hearts, linework or dot flowers. Whatever you can design, even stickers over the painted basecoat, then seal with a waterbased varnish to finish. Also, if using stickers, I would varnish first then apply your stickers over the varnished surface.
Notice my swiss dots around the face of the clock? It gives a little lacy style. Again, seal your work with a waterbased varnish in satin finish or gloss to complete. This step, I feel is important for the life of your design surface making it easy to wipe clean and keeps from any scratches.
Thank you for stopping by and hope you enjoy a wonderful summer Friday and great weekend.
Happy Creating, Celestina Marie
Monday, July 23, 2012
CHRISTMAS IN JULY
Welcome Friends to my Christmas in July sale with many treasures at reduced prices and new items arriving till the end of the month.
It is never too early to begin thinking of our gift giving and decorating. With Christmas just 6 months away, I thought it a good time to start thinking Christmas.
I know the thermometer is soaring for most of us and hard to be looking towards the winter months and holiday time, but maybe it will cool us off a bit to view some pretty winter treasures.
Thank you for stopping by and welcome HERE to my shoppe to view more treasures for Christmas and anytime of year.
As always, wishing you the perfect summer day filled with many blessings.
HAPPY CREATING
Celestina Marie
Tuesday, July 17, 2012
French Graphic Label Decorating
Hello Blog Friends,
Have you noticed the fun everyone seems to be having decorating with french labels? I just love it and along with creating treasures for my shoppe, I have been doing a bit of designing with labels for my home too.
Carol from The Polka Dot Closet creates Waterslides and a couple months ago I purchased a set from her shoppe. They are just so much fun to work with. If you have not visited Carol, I invited you to do so. She is amazing and very talented with lots of fun decorating ideas to share.
To begin, I found this vintage tray, gave it a painting right on top the metal with no priming. Just wanted to see what the effect would be and the paint distressed and cracked on it's own making an interesting surface. The waterslide was then added to the center to complete the new look.
This next oval tray was done the same way but without the distress on a cottage cream background.
Next I added a waterslide to a redesigned and painted tilt table. I plan to add a design of roses and white hydrangeas to this top, but this is the look so far.
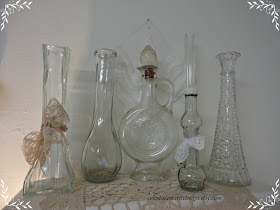
Waterslides also work great on glass like vintage bottles or even some salad dressing bottles like I have used here.
The vintage vanilla graphic bottle has been stuffed with furry trim so you can see the graphic.
Another way I have used graphic labels is to copy on card stock paper, cut and apply with decoupage and seal with Triple Thick. You've heard me talk about Triple Thick before. It is a glaze like sealer that puts a thick layer of shine over the graphic to seal it into the surface. It makes the finish look like it is part of the surface.
Here are a few finished items with this method.
How about decorating the ugly remote control holder?
I have a vintage crock that was my mother's used to make green tomatoes. It now holds two vintage spaghetti sticks that are treasured keepsakes to me. You ask what are spaghetti sticks? Well, these were 36 inch long rolling pins of sorts used to roll homemade pasta dough very thin before cutting into lengths of pasta. My grandmother used these her whole life to make the family homemade pasta noodles. The taste is better then anything you will ever purchase packaged in the store.
Another surface worth noting is a glass vitamin bottle re purposed adding a vintage perfume label. I had a few glass brown bottles, formerly holding my vitamins, added a french label and decorated the lid using bits of crocheted lace formed into roses and buds added to the lid with ribbon lace and a vintage cameo. The lid is removable to hold bath salts or lavender etc.
Before I end, let me share this vintage wood bread box I just completed and coming to my shoppe. The french lettering is hand painted along with my roses.
I did finally complete my living room redesign and here is a peek at the finished room.
Thank you Carol for the Waterslide graphics and thank you to The Graphics Fairy for the great vintage label designs.
See you next time~ Happy Decorating!
Celestina Marie
Friday, July 13, 2012
My Cottage Studio, Joining Where Bloggers Create 2012
Welcome blog friends to the 4th annual Where Bloggers Create, hosted by Karen Valentine of My Desert Cottage. A yearly party event sharing the creative spaces of bloggers from all over the world. It is a fun time for all peeking into the studios of talented bloggers where there is always plenty of inspiration.
Many years ago when I first started on this path, I studied decorative painting and fell in love with the creative process. I set up my creating in many a studio settings from the kitchen table, spare bedrooms, basement and today my repurposed 3rd car garage. Recently with the help of my Best Guy, we redesigned my space to reflect a new direction. From the floor to the ceiling and everything in between, I have made lots of changes. Keeping with a light cottage cream and neutral palette with french toile mixed in.
In the beginning, folk art was my focus with country styling giving way to the romantic and cottage styles that I specialize in today. Hand painted roses and vintage inspired cottage decor are my specialties along with holiday, shabby and French chic decorating.
Creative storage with pretty display and organization are my focus and inspire me everyday.
Along the way, I have had the joy of painting ornaments for the White House Blue Room Christmas Tree in 1998 and 2004 as a member of The National Society of Decorative Artists for 24 years. I have met many wonderful friends on this path, all because I swing a paint brush.
This wonderful journey has found me working in many areas involving designing, from Art Shows, Brick and Mortar Shops, Antique Malls, Display, Interior Design, Ebay, Teaching Beginning Decorative Painting right here in my home studio and the last 5 years here on Etsy. I am a member of Shabby Cottage Shops.com and Etsy Cottage Style along with Cottage Style Street Team, Farmhouse Treasures and Devotion to Promotion Teams. I am also a network member with Linkedin at Celestina Marie Design.
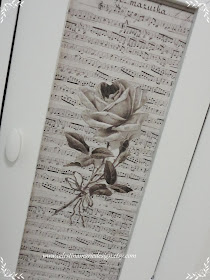
Like I shared, my studio is a converted third car garage all recently redesigned in shabby white, french inspired toile and crocheted lace with vintage treasures throughout. I love the new look as it has inspired me like a blank canvas to expand my creativity with the roses that are a favorite of my dear and valued customers. Their patronage has been a true blessing as they always continue to inspire me in new directions for home decor and cottage interiors. My family is also very important to me and I am so thankful for the support and help they give when seasonal times get very busy and they always understand. So let me take you around the room sharing my storage and redesigned space.
Over the years I have come a long way from where I started at the kitchen table to the studio I have today. The following are a few of my favorite quotes including one my Father once told me many years ago, "Find what you love to do and you will never work another day of your life" I will continue to do just that!
Thank you for stopping by to visit my studio and thank you Karen for hosting this special event once again.
p.s. I dedicate this years post for Where Bloggers Create to my sweet Miss Beazy Lee who was hit by a car and killed May 22,2012. She was a huge presence in my studio and is dearly missed.
Have Fun and Happy Creating,
Celestina Marie
To view treasures arriving from this studio, visit HERE
The french graphics used around the room are from THE GRAPHICS FAIRY