Hi Everyone!
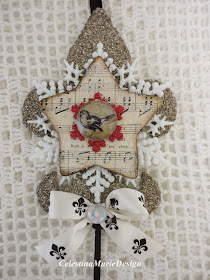
In my last post I shared this ornament card
and the steps to creating it.
Thank you for you visits and comments.
I hope you might try it and have some fun.
If you are interested in the how to, just scroll down to the next post.
In my last post I shared this ornament card
and the steps to creating it.
Thank you for you visits and comments.
I hope you might try it and have some fun.
If you are interested in the how to, just scroll down to the next post.
Since that post
I thought I would share a few more ideas
I've been working on and a few from last season too.
Here are a few more quick and easy ideas.
Perfect for gifts, trimming the tree,
sending as a card in a bubble envelope
or tying on a package.
Here are the supplies needed.
The rest is up to your own creativity
and imagination.
Most of the supplies are gathered
from the Dollar Stores,
Michael's and JoAnn's Dollar section
along with bits and pieces left from other projects.
Backside with designer paper
to open for a message.
Tinsel trimmed.
It looks so pretty on the tree.
The following is a variety of ideas
you might like to try.
Again the supplies were gathered from Dollar bins
at the craft stores.
Love the red snowflake for a pop of color.
Backside with designer paper left blank to write a message.
Backside star to write greeting.
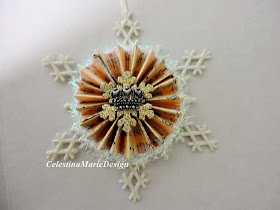
Since creating this ornament,
I have decided to copy and print the fan graphic on both sides of the paper.
This allows the backside to look just as pretty as the front.
I always find vintage molds on my junkin hunts
and they too make sweet ornaments.
For these below I used wood shapes with added graphics,
glitter and trims of tinsel and ribbons.
I glued the shapes inside the molds raised a bit with another
block of wood all hot glued in place.
I also use distress ink or paint adding to the edge of the wood
and papers.
Graphic papers cut to the wood shapes with charms.
They finish these old molds
to make sweet ornaments.
Here are a few more in a white theme.
Inside the mold I added wood glittered snowflakes
with word messages, like~
Inspire dreams~
or creative journey!
This next ornament is designed using an old cookie cutter and
created the same way.
With wood shapes raised and glued in place on
another small block of wood.
Trims, glitter, and charms add the finishing touch over chalk
paint with distress.
I drill a hole in the tops of the molds to add a ribbon for
hanging on the Christmas tree.
Every year ornaments seem to be
the best sellers in my shoppe.
I never get all that I want to offer completed.
It's an on going journey year round
and one I truly love and thankful for.
Hand made ornaments for giving
at Christmas are so special
and like nothing you
will find in the stores.
I think they are as wonderful to give as to create.
Thank you for stopping by,
and a big welcome to all new followers.
So nice to meet you and have your visits.
Stay Warm!!
and
till next time,
Wishing you,
Southern DayDreams~
Celestina Marie
Graphics for the designs used in these ornaments
are courtesy of


