Have you started spring cleaning yet?
Recently as I was doing some spring cleaning,
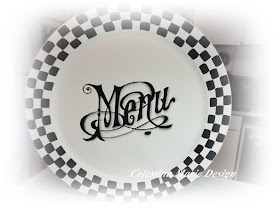
I dusted this large tray turned Menu sign
and thought I would share it with you once again
and how I painted it with the word Menu.
I dusted this large tray turned Menu sign
and thought I would share it with you once again
and how I painted it with the word Menu.
Found at a local antique market,
I loved the large size to fill in space above my kitchen cabinets.
This tray measure about 20" round.
I gave it a coat of glass and tile medium which I have shared here many times.
Metal primer can also be used
but I was out it so the glass and tile works just as well.
Metal primer can also be used
but I was out it so the glass and tile works just as well.
This step gives the surface some tooth for the paint to adhere.
After applying the medium
it's best to let cure 24 hours before
painting.
After applying the medium
it's best to let cure 24 hours before
painting.
The Glass and Tile medium is by Folk Art
along with the black paint that I used for the design.
along with the black paint that I used for the design.
After the background is painted with chalk paint in a light ivory,
I made a copy of the menu graphic
from
and a stylus~
Next I
painted the design by hand.
painted the design by hand.
Sometimes I love to do this over the easier versions of transferring.
It gives a hand painted look and is really a lot of fun and relaxing
a bit like adult coloring.
a bit like adult coloring.
If you remember the graphic above, it had the shading lines included.
At this point,
I could have painted those lines too, but I floated the shading instead.
This is a term and technique used to bring a shadow to the design.
Next, the edge needed a little something too.
So I hand painted black and white checks all around and added light sienna shading.
You know how I love checks~~
You know how I love checks~~
Here is the tray now on the top of the cabinets with a black and white rooster.
Thanks to The Graphics Fairy
for always sharing the best designs to create with.
Have you painted anything lately??
I'm on to redesigning some bedroom pieces from the 1940's.
More about that soon.
Have you painted anything lately??
I'm on to redesigning some bedroom pieces from the 1940's.
More about that soon.
Have a great day
and
and
Happy Creating!


